
Set up your no-code workbench
Step by step tutorial on how to set up n8n on DigitalOcean

As I explained in my last article, I will not create an AI Automation Agency in 2025. Instead, I will build a holding company for microSaaS solutions.
This is the first article of many. Follow these articles if you want to copy what I’m doing. Today, we’ll start by creating a workbench.
Your workbench
We’ll need two things for this: n8n and DigitalOcean.
I also use Make, Zapier and build custom apps using Cursor. I’ll write up a comparison deep dive at some point. For now, let’s just believe me when I say n8n is going to be your all around solution for building automations and AI Agents without coding.
n8n
I’ve been using loads of no-code and low-code tools for years including Bubble, Zapier, Make, n8n, and many others. Some are more versatile, some are use-case specific.
My two favorites are Make and n8n. In these tutorials, I’ll show you how to use n8n because it will give you all the tools you’ll need for microSaaS apps.
There is a detailed breakdown of Make vs n8n in this article:

We’ll need this workbench because we want to have the ability to create prototypes of new apps quickly. Every app I build will start as either a fun love project or some work I do for someone else. The latter means that my development cost is zero because it’s paid by someone. I will use n8n for this because I can host it myself for free and whatever I build for my client, I can just set up their n8n instance and install my automations there.
To do that, let’s install n8n on a DigitalOcean droplet with your custom domain, so you can have something like this:
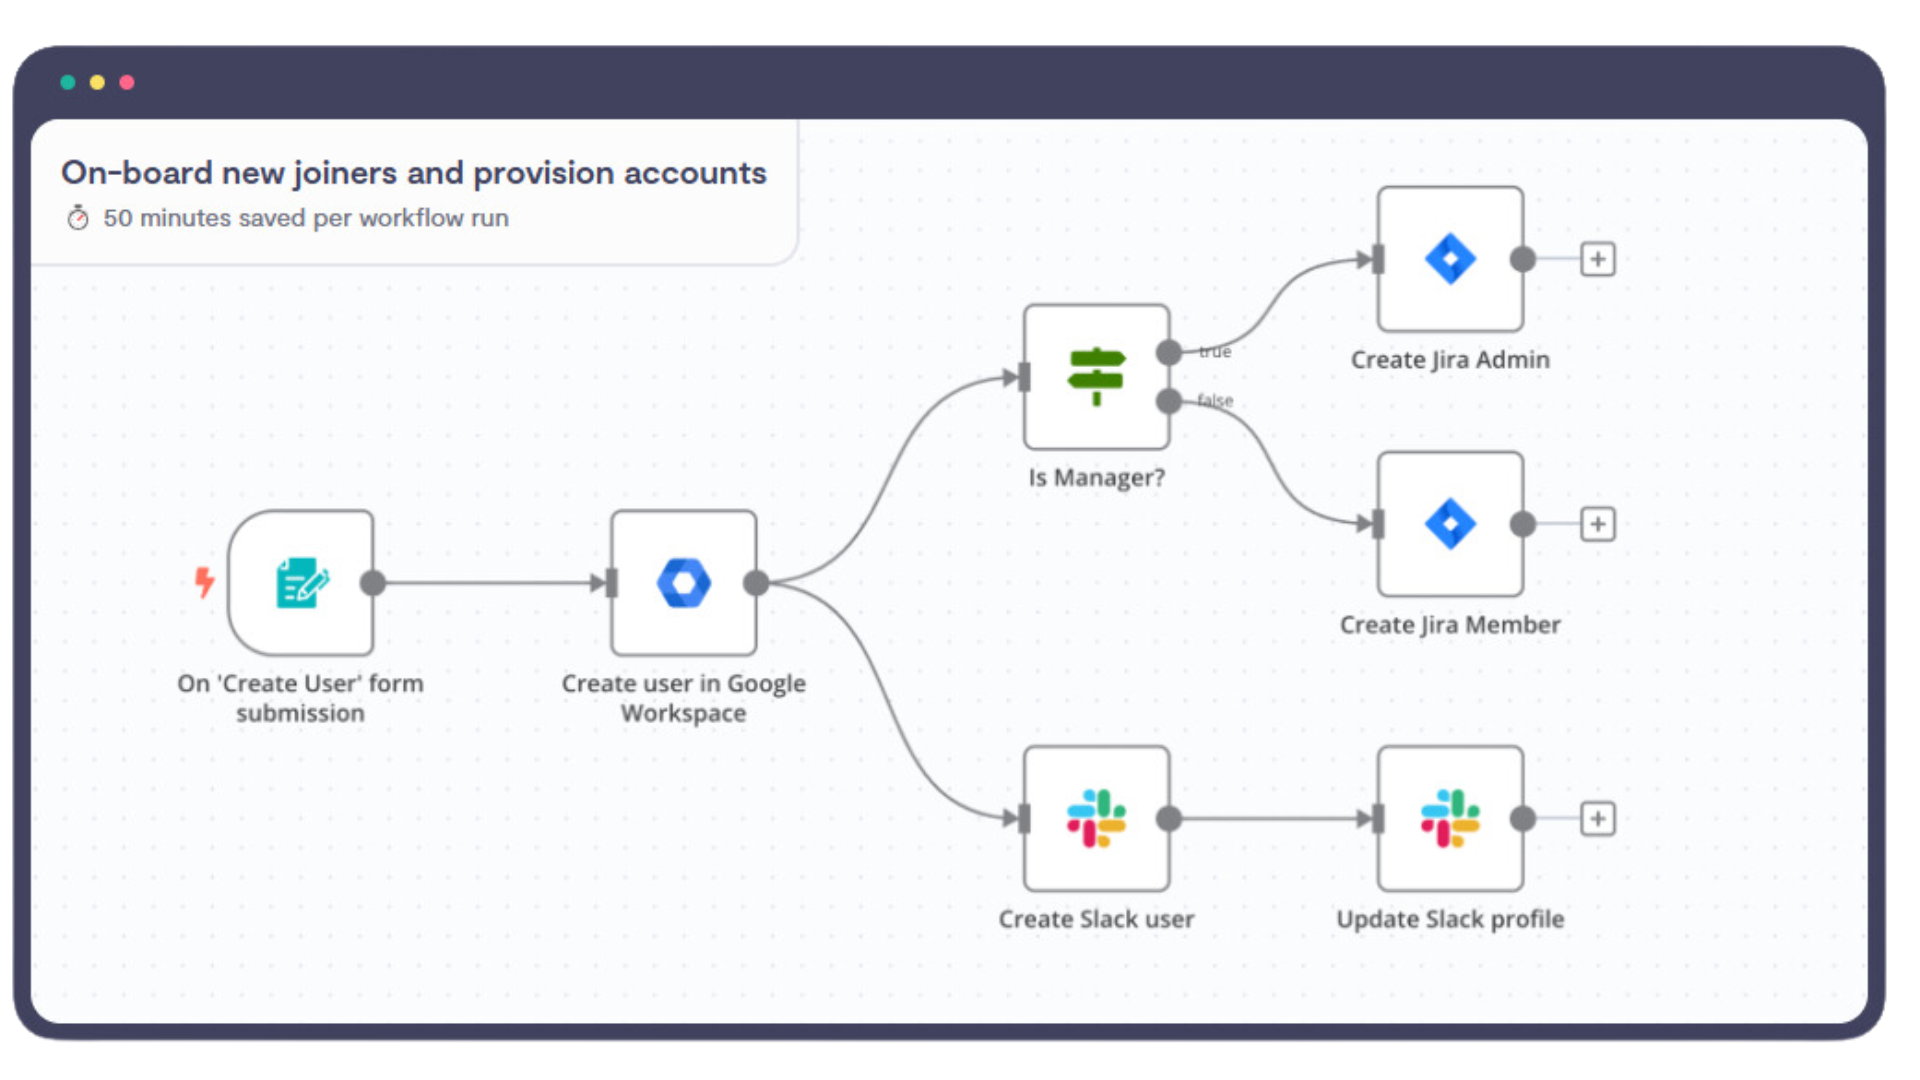
I love n8n because it’s pretty easy to use but it’s functionality is at least 10x of Make. Also, Make can get pretty pricey pretty quickly, while n8n is almost free if you build automations for yourself. (But you need to pay for hosting.)
DigitalOcean
So the only cost we’ll pay is hosting and for that I’m currently using DigitalOcean. DigitalOcean is a cloud provider where you can rent virtual machines — these are called droplets.
I pay $10 per month for a droplet (you can start as low as $4) and this setup allows me to run workflows nonstop. To give you an idea, if I wanted to totally exhaust my DigitalOcean droplet, I’d be running a powerhouse of automations. The same in Make would cost me thousands of dollars per month.
You’ll need to create an account on https://digitalocean.com to get going.
Go ahead, register and once you’re done, come back to this article, because we’re diving in.
Step 1: Create your Digital Ocean Droplet
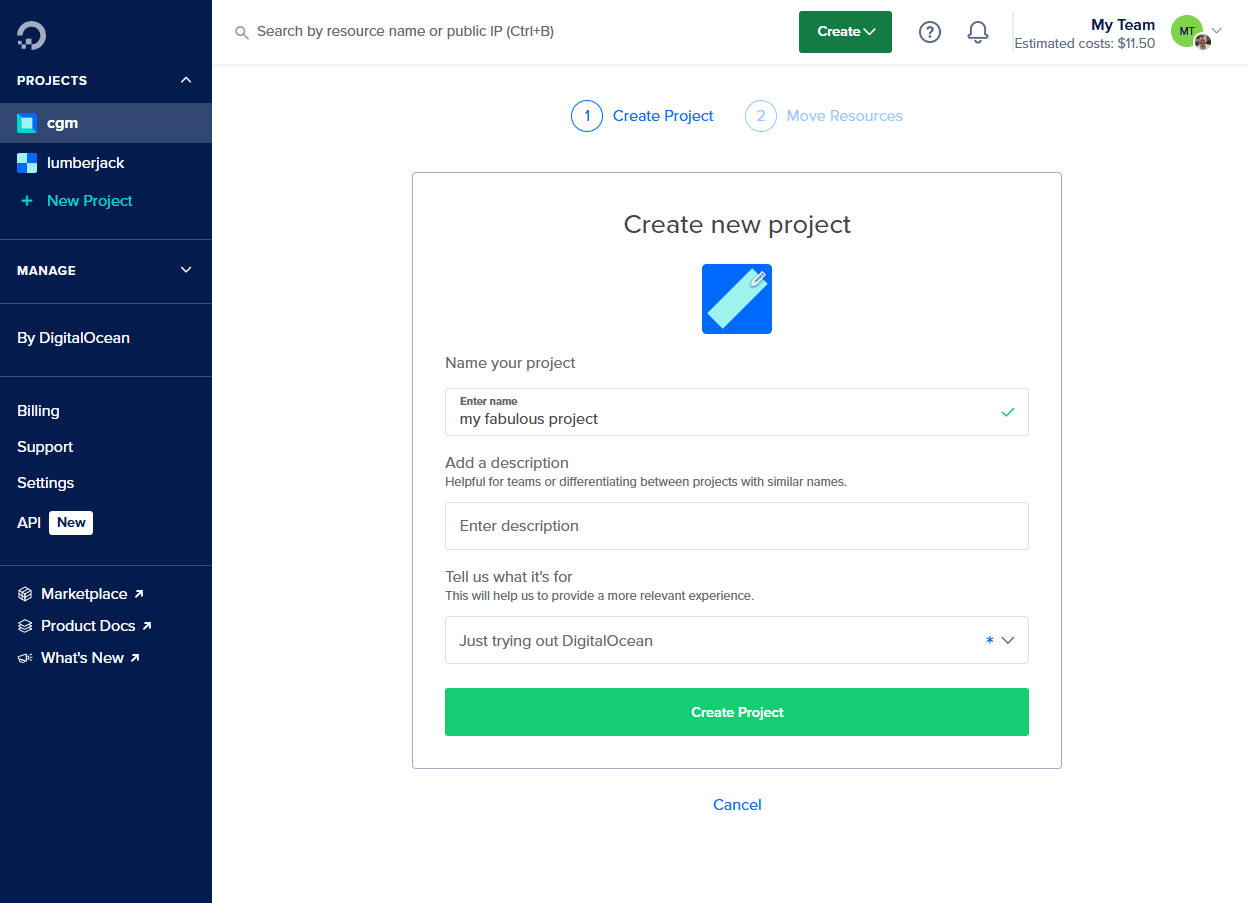
First you’ll need to create a new project. Click on “+ New Project” on the left side of the screen, fill it in and when you’re ready to go, click “Create Project”.
Once you’re there, you’ll want to create a so called Docker Droplet. You can do that by following this link and then clicking on “Create Docker Droplet”.
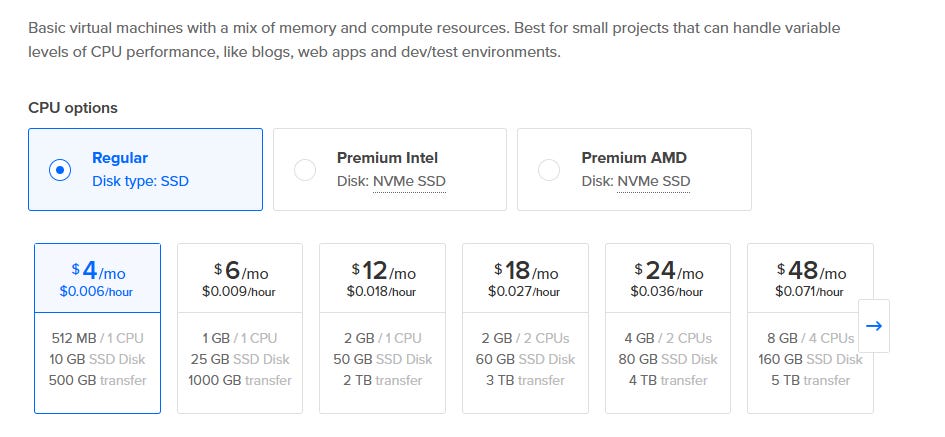
There’s not much to edit here for now. Select the lowest tier and set a password.
Once you added your password, click on Create and tadamm! Once it’s done, the progress bar disappears and you’ll see a reassuring little green dot indicating your Droplet is live and operational.

Congratulations, you’ve just configured your computer on someone else’s computer in the cloud.
Step 2: Install n8n on your machine
If you’re not technical, using a terminal might sound daunting. Don’t worry, I’ll walk you through it.
First, click on the name of your newly created machine to open its settings. Then find the “Console” sign on the right side of the screen and click on it.

It will launch a new window with an Ubuntu terminal. If you see something like below, you’re good.
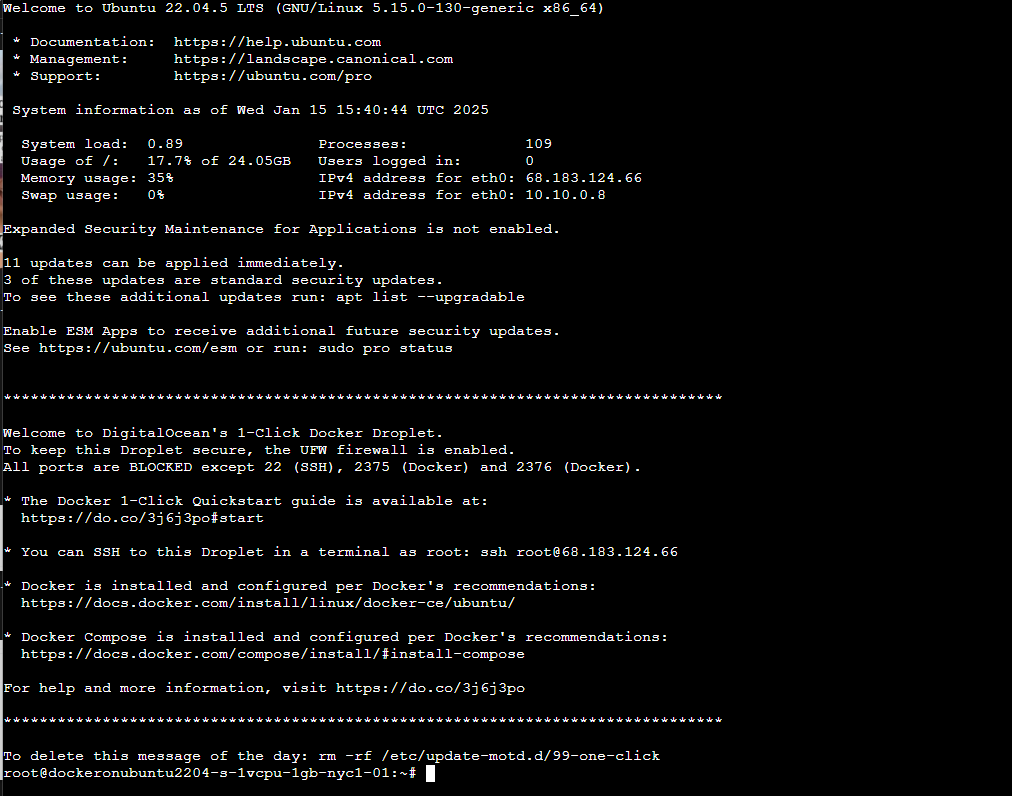
As you can see in the terminal, you’re logged in as the root user. As a general rule, it’s not advisable to work as the root user but we’ll ignore that now for speed.
Next, you’ll need to clone n8n into your machine from Github by entering the following command:
git clone https://github.com/n8n-io/n8n-docker-caddy.gitThen change directory so you can work within this new repository:
cd n8n-docker-caddyYou should see something like this:

Step 3: Configure your application
Unfortunately it’s not enough to just clone the code onto your machine. You’ll also need to configure so it can run — and do so properly.
In order to do that, we’ll use two services: Caddy and Docker.
Caddy is a web server service that will basically take care of running n8n over the internet.
Docker uses containers to make an application portable. Think of it like a packaging box.
When you run apps using Docker — like in our case — some data need to stick around regardless of when you start or stop the application. Docker volumes help with that as they act as dedicated storage spaces.
Creating Docker volumes
We’ll need two of these: one for n8n and one for Caddy:
sudo docker volume create caddy_datasudo docker volume create n8n_dataIf we didn’t have these, our web server would take a lot longer to start each time and n8n would forget all your saved workflows and settings, which we obviously don’t want.
Open ports
Next our job is to make sure n8n can receive incoming traffic. (It is a web application after all.) To do that, we’ll open two ports. 80 for non-secure and 443 for secure traffic:
sudo ufw allow 80sudo ufw allow 443Configuration
In this step we’re going to configure a few things. Thankfully our setup already has the necessary configuration files, but we will need to edit them. Since your DigitalOcean Droplet is running on Ubuntu, we can use the nano command to open and edit our files from within the console.
We’re going to edit three files:
.env to configure our main variables that the rest of the application is using
Caddyfile to tell Caddy where will our app be running (ie: demo.lumberjack.so)
Docker Composer to configure how Docker should build the containers
dotenv
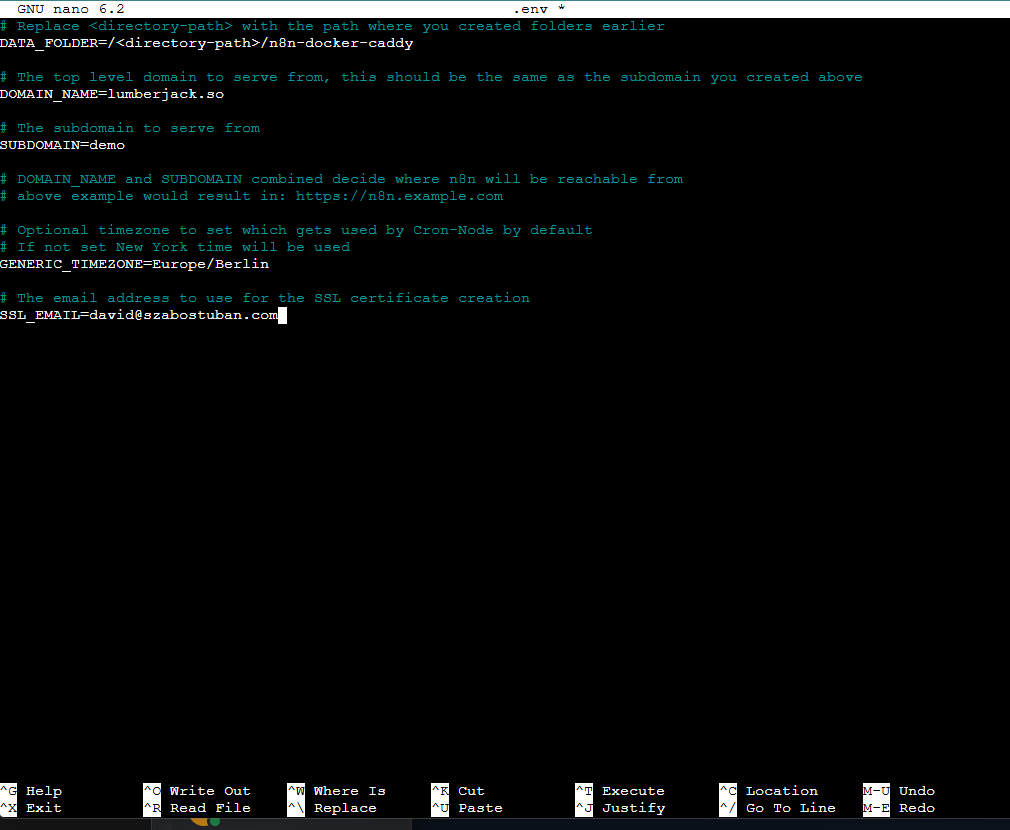
Let’s open our .env file:
nano .envA few notes here:
Delete <directory-path> because we just added n8n in the root folder
Add your domain, subdomain
Add your email address
Press Ctrl+X and then Enter to exit.
Caddyfile
Then we do the same with Caddyfile. Open the Caddyfile in caddy_config:
nano caddy_config/Caddyfile
Here you’ll need to change the first row to your final destination for your n8n instance. So for example if you want to run n8n on n8n.mywebsite.com, then enter that here.
Docker Composer
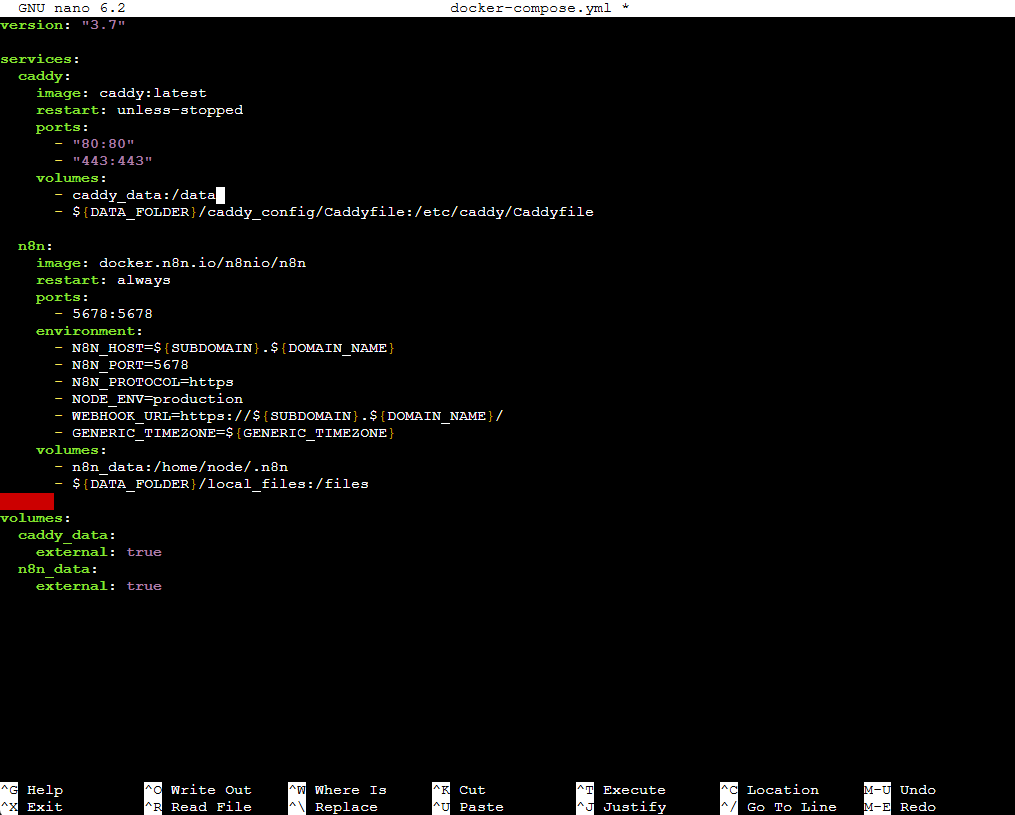
Once you’re done with that, we need to edit the docker-compose.yml file.
nano docker-compose.ymlFor some reason the below configuration from services / caddy / volumes will cause errors. I’m not really good at DevOps so I’m not exactly sure why, but apparently this is not required, so just delete it the following line:
${DATA_FOLDER}/caddy_config:/config
The end result should look like this:
Step 4: Boot up!
Alright, almost there. Once you’ve configured everything, you’ll need to boot up your application so it can start running. This will be done by using the Docker Composer, basically asking it to build our app. To do that, use the following command:
sudo docker compose up -dIf it’s successful, you should see something like this:

We’re almost there!
Step 4: Point your app to your domain
Let’s recap what we’ve done so far: we copied n8n from Github to your server (Droplet) on DigitalOcean, then configured all the settings so it can run. Once finished, we launched the whole thing, so somewhere in one of the 12 DigitalOcean datacenters a piece of hardware is now humming just for you, waiting to run all sorts of smart automations.
However, you will need to plug this into a website address to access it via the Internet. To do this, you will need to modify your domain settings.
I’m assuming you have a domain of some sort. If you have a website, you can use that. Here’s what you’ll need to do:
You will need to create an “A record” that points your selected subdomain to the IP of your droplet. (In my case demo.lumberjack.so points to 68.183.124.66 IP address of my server.
Your domain provider can give you specific instructions on how to do this. Here’s one for GoDaddy and one for Namecheap.
Here’s how it looks like properly set up on my Namecheap account:

Once done, you’ll need to wait for the propagation to be completed, but after that, you’re finished.
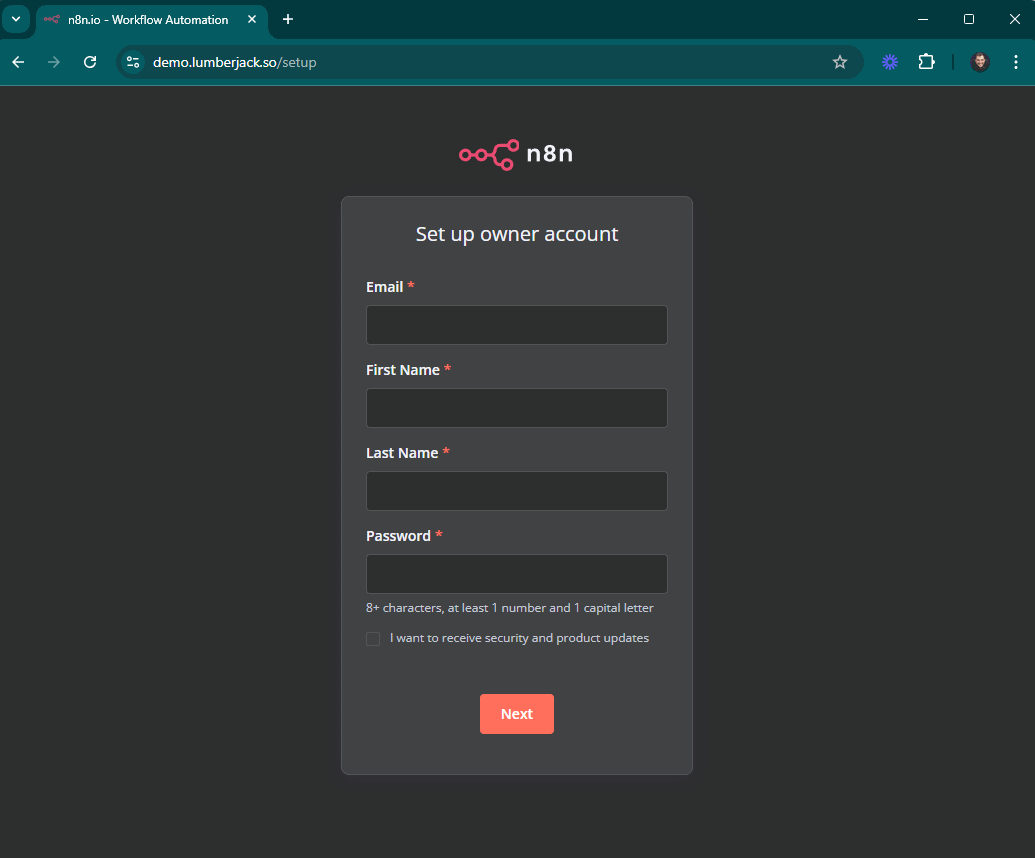
Step 5: Start building!
Congratulations, you just installed your own automation powerhouse for $4 per month. Go ahead and create your owner account. Look around, play with it.
If you need more help, you’ll find more technical support on the n8n website (including a tutorial that I was using) and some others.
n8n also has 1185 prebuilt workflows on their Workflow Marketplace. Some are great, some are terrible, some are free, some are paid. I’ll cherry pick a few great ones from there every now and then.
In my next article I’ll create an in depth analysis on different no-code and low-code platforms for indie makers. If you want to build AI agents but not a developer, you’ll like that.
Awesome, I’m definitely going to follow these steps today and see how it goes. Looking forward to getting everything set up.
Great stuff, thanks for that David. Got stuck / errors a few times, but with some assistance from ChatGPT, figured it out 🙏